


Installing a robotic lawnmower may seem technical at first glance, especially when you discover the concepts of terrain mapping, charging station, GNSS antenna or perimeter wiring.
However, with Navimow, the process becomes much simpler: the precise RTK EFLS 2.0 location technology allows for perimeter cable-free installation on the majority of terrains.
In this article, we guide you step by step to successfully install your Navimow robotic lawnmower — including the popular Navimow i105 model, but also other models such as Navimow i108, H-Series and X3.
Summary
Why choose Navimow for your installation?
Most robotic lawnmowers on the market (Husqvarna, Worx, Kress, etc.) require the installation of a perimeter wire around the entire lawn. This can represent several hours of work, frequent adjustments, and additional costs if you modify your garden.
Navimow simplifies everything:
- ✅ Wireless perimeter installation thanks to RTK EFLS 2.0
- ✅ Smart mapping from the app
- ✅ Easy adjustments without manual work
- ✅ Quiet, efficient, suitable for complex gardens
- ✅ Intelligent security (obstacle detection, anti-theft, sensors)
To learn more about the brand, visit the official French Navimow page.
Materials needed before installing the Navimow robotic lawnmower
Before you begin installing your Navimow robotic lawnmower, it's important to prepare all the necessary equipment. Even though Navimow greatly simplifies the process thanks to the absence of a perimeter wire and RTK GPS navigation, a few tools and accessories are essential to ensure optimal and safe commissioning.
Before you begin, make sure you have:
- Navimow charging station
- Navimow robotic lawnmower (e.g., Navimow i105)
- GNSS Antenna
- Power cables
- Smartphone with the Navimow app
- Access to an outdoor electrical outlet
Trick :
- Charge the robot to 100% before your first installation for optimal calibration.
How to configure your Navimow robotic lawnmower in a few steps
Step 1. Choose the location of the charging station
The charging station is the heart of the system and its placement directly influences navigation accuracy and mowing efficiency.

✅ Golden Rules
- flat and stable surface
- Near an electrical outlet or a secure power cable
- Clear area of at least 1.5–2 m in front of the base
- Avoid areas that are too wet or on steep slopes
- Provide easy access for maintenance
❌ To be avoided
- Under very leafy trees or in areas with heavy leaf fall
- Next to a metal gate, a barbecue, or anything else that could interfere with the GNSS signal
- Too close to a wall or a significant drop in elevation
💡 Practical tip
- Position the base so that the robot can move in a straight line for a few meters.
- On the H and X3 models, it is sometimes recommended to leave more clearance in front of the station to optimize navigation on large areas.
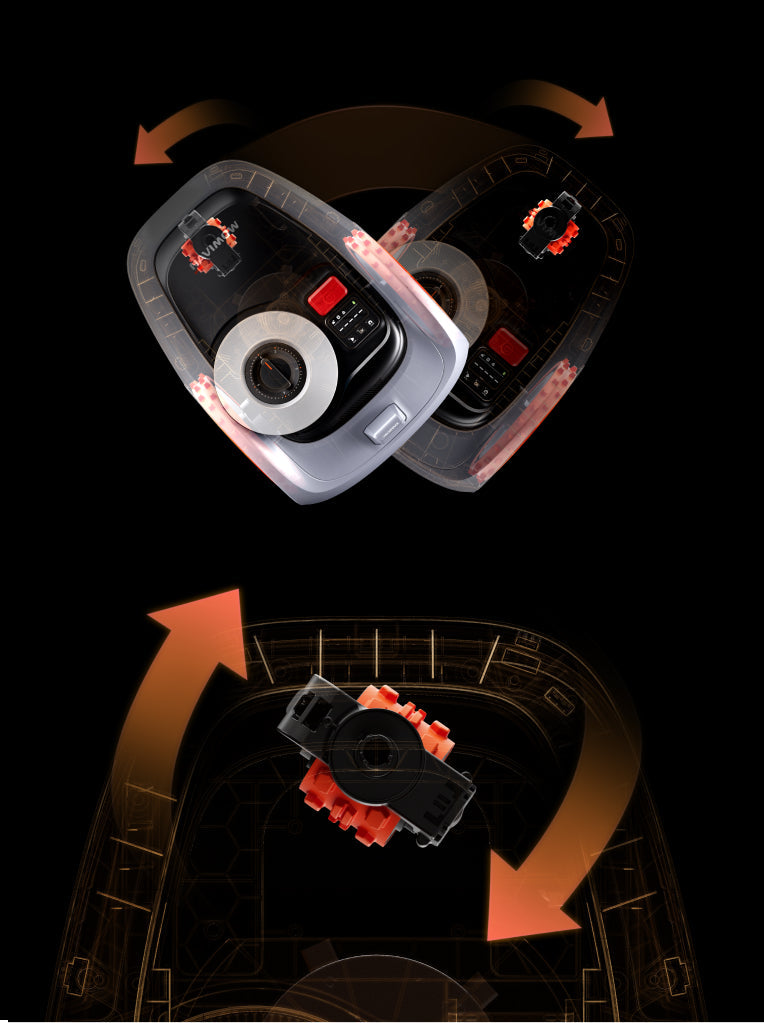
Step 2. Installing the GNSS antenna
Navimow RTK/EFLS technology allows the perimeter wire to be replaced by a GNSS antenna. Its correct installation is crucial for the robot's accuracy.

✅ Installation recommended
- On a stable support: post, pillar or solid facade
- Minimum height: 1.5 m to avoid interference
- Clear view of the sky: avoid walls, hedges or trees that block the signal
- Securely attach the cable to the charging station according to the manual
❌ To be avoided
- Attach the antenna to a moving or unstable surface
- Install in the immediate vicinity of metal objects
- Burying the antenna (this significantly reduces accuracy)
💡 Tip by model
- i-Series (i105/i108): a single antenna is sufficient for 2–3 standard mowing zones
- H-Series / X3: For large areas or complex terrain, a higher support or a dual antenna system for remote areas may be necessary.
Step 3. Map your land in the application
The Navimow app guides the user step by step, eliminating the need for a robotic lawnmower cable installation diagram.

Download the app and connect your robot. Start creating a mowing zone.
Two options depending on the model:
- Guided walk: you accompany the robot along the perimeter
- Autonomous: the robot automatically roams the garden (i-Series)
Define:
- Restricted areas: swimming pool, vegetable garden, pathways, flowerbeds
- Narrow passages: allowing navigation through narrow corridors
- Secondary zones: for multi-level or special sections
💡 Differences by model
- i105 / i108: ideal for home gardens, simple or medium-sized areas
- H-Series: can manage multiple large areas, perfect for gardens with multiple levels or obstacles
- X3-Series: recommended for very large plots (>2000 m²), with complex multi-zone and advanced mapping
| Note : | Unlike other brands, no perimeter wire is required. You can modify your virtual map at any time if your garden changes. |
|---|
Step 4. First mowing test

Select automatic mode in the application
Adjust the cutting height according to the type of grass and the season
Monitor the robot during the first cycle to:
- Identify unmapped obstacles
- Check the accuracy of the trajectories
- Detect any area where the robot could get stuck.
💡 Advice by model
- i-Series: generally ready to use right out of the box
- H/X3: It is recommended to test each zone separately to optimize trajectories and adjust speed and power parameters.
Step 5. Optimize the installation
- ✅ Keep the firmware and application up to date to benefit from software improvements
- ✅ Clean the station and surrounding area regularly to prevent the accumulation of leaves or debris
- ✅ Check the antenna height if the GNSS signal is weak or if the robot loses mapping
- ✅ Add or edit restricted areas in the app when you install new plants or structures
- ✅ For complex terrain, adjust the speed and passages in the app to avoid collisions
💡 Additional tips
- On X3s or large lawns, plan mowing cycles according to zones to save battery power.
- On slopes or steeply sloping areas, check the robot's center of gravity and stability.
- For subdivided gardens, use the app's multi-zone feature.
Quick visual summary by Navimow template
| Model | Facility | Navigation | ideal plot | Specific advice |
|---|---|---|---|---|
| i105 | Simple, single antenna | RTK EFLS, 2 cm | Domestic gardens | First cycle easy |
| i108 | Similar to the i105, but with greater battery life | RTK EFLS | Medium to large gardens | Adjust secondary areas |
| H-Series | Installation took a little longer, but the antenna was more stable. | RTK + multi-zone | Large gardens, several areas | Test each area separately |
| X3-Series | Advanced installation, high or dual antenna | Advanced RTK + additional sensors | Very large plots of land / professionals | Custom settings, cycles by zone |
How to choose the right Navimow model for you
| Model | Maximum surface area | Peripheral cable | Key advantage |
|---|---|---|---|
| Navimow i105 | 500 m² | ❌ Cable-free | Ultra-simple installation |
| Navimow i108 | 800 m² | ❌ Cable-free | High precision, larger fields |
| Navimow H-Series | 500–3000 m² | ✅ Can use cable | Very large & complex gardens |
| Navimow X3 | >3000 m² | ✅ Professional installations | Professional use / large estates |
🔗 Buy the flagship i105 model online: https://navimow.segway.com/fr-fr/products/navimow-i105-fr
🔗 i108 product page: https://navimow.segway.com/fr-fr/products/navimow-i108
🔗 Discover the X3 series (professional sales and stores): https://navimow.segway.com/fr-fr/pages/navimow-x3
🔗 H Series: https://navimow.segway.com/fr-fr/pages/navimow-h
Navimow Installation FAQs
1. Does Navimow require a perimeter cable?
No, for the i-Series models, no perimeter wire is required. Virtual mapping and the GNSS system allow the robot to detect the boundaries of your lawn with an accuracy of up to 2 cm, without any additional work or buried cables. However, for some professional models such as the H-Series or X3, a perimeter wire can be used as an option in very complex configurations or on extremely large lawns to improve accuracy in specific areas.
2. Can I install Navimow myself?
Yes, most users can install a Navimow robot without outside help. The Navimow mobile app guides you step-by-step through setting up the charging station, positioning the GNSS antenna, and mapping your garden. Even for properties with multiple zones or narrow passages, the app's built-in assistant makes it easy to define no-go zones and plan routes. This makes installation simple and intuitive, even for a complex garden.
3. What if my garden has several zones?
Navimow easily manages multiple zones thanks to virtual mapping. You can define secondary zones, narrow passages, or no-go areas directly from the app, without having to install additional cables. This flexibility allows the robot to adapt to evolving or multi-level gardens, while optimizing the mowing cycle and ensuring complete grass coverage.
4. How long does the installation take?
Installation time typically varies between 30 minutes and 2 hours, depending on the size and complexity of your garden. For small, flat, open gardens, setup can be very quick, while larger areas with multiple zones, slopes, or obstacles may require a little more time to optimize mapping and initial settings.
Conclusion
By following this step-by-step guide, installing your Navimow robotic lawnmower becomes quick and easy, even for beginners. Whether you choose the i105, the i108, or the H and X3 series, your lawn will be perfectly maintained thanks to intelligent mapping and high-precision navigation. No more wasting time with cumbersome cables or complicated settings: transform your garden today with Navimow!

Compartir: