


Building your own robotic lawnmower garage is worthwhile if you want to protect your robot from sun, rain, and the elements. Storing it indoors is inconvenient, and parking it outside will strain its lifespan. A sturdy garage extends the lifespan of your robotic lawnmower and makes everyday life much easier. Many manufacturers offer additional garages, often for more than €100. Even with models like the Segway Navimow, which include a free garage, these basic garages are lightly constructed and offer only limited protection against heat and strong sunlight. Whether you already have one or not, building your own garage is easy. With these step-by-step instructions for building your own robotic lawnmower garage, you can create a stable and protective solution in five steps.
Contents
- First step: Choose the right material for your robotic lawnmower garage
- Second step: Measure the size of the robotic lawnmower garage
- Third step: Prepare materials for the robotic lawnmower garage
- Fourth step: DIY robotic lawnmower garage according to blueprint
- Fifth step: Decorate or add optional accessories
- Summary
- FAQs on the topic
First step: Choose the right material for your robotic lawnmower garage
If you want to build a robotic lawnmower garage yourself, it all starts with choosing the right material. Different materials offer different levels of protection, fit differently into the garden, and also determine the effort and difficulty of construction. In German gardens, five materials are primarily used that have proven themselves, so after selecting them, you'll know exactly which one is best suited for your garage.
1. Aluminum garage
Aluminum is the most common material for robotic lawnmower garages. Ready-made models can be assembled in one to two hours using a cordless screwdriver or a screwdriver; those seeking more protection can cut and assemble aluminum panels themselves. The material reliably protects against rain and rust, is low-maintenance, and easily lasts for over ten years. However, it has the disadvantage of being thin and offering only limited protection. Furthermore, the modern, sleek design doesn't always blend harmoniously into a natural garden.

Acrylic rack
If you don't place much importance on protection and want to build the garage as cheaply and quickly as possible, acrylic is a good choice. A frame made of aluminum profiles or galvanized pipes, topped with 3- to 5-millimeter-thick acrylic or polycarbonate panels for the roof, and you have the basic shape of the garage. Costs range from €10 to €30. The advantage: flexible, easily adaptable, and space-saving. The disadvantage is that the material is light and transparent, offering little protection against sun, wind, or impact. For better UV protection, we recommend using acrylic with a UV-protective coating.

Wooden garage
Wood is great for a robotic lawnmower garage because it looks natural in the garden and conveys a real DIY feel. Regular wooden boards or old pallets are available almost anywhere; they're easy to cut, drill, and nail, are much lighter than metal or brick, and can be flexibly adapted. Doors, decorations, or custom dimensions are no problem; the result looks rustic and harmonious. It's important that the wood is impregnated, the roof keeps out rain, and wood preservative oil keeps insects away. Regular inspections and occasional readjustments ensure everything remains stable.

Brick garage
A brick robotic lawnmower garage looks the most stable from the outside and feels like a real garage, but it's the most complex DIY option. Those without much bricklaying experience risk leaning walls, cracks, or water damage. It's also labor-intensive and expensive, making it virtually impossible to move. However, it offers excellent protection, will withstand wind, sun, frost, and heat for many years, and fits perfectly with brick houses or a classic garden style, thus conveying a real sense of permanence.

Heavy metal garage with door
If you're a hardcore DIY enthusiast, a wooden or brick garage might be too simple for you. A heavy-duty metal garage for a robotic lawnmower is just what you need. It can withstand wind, snow, heavy rain, and even heavy impact, and a door system also protects against theft. However, the construction is challenging: metal panels are heavy, requiring at least two people to transport and install, and tools like a drill, rivet gun, or metal cutters are essential. For a sliding door, the track, springs, and hinges must fit precisely; otherwise, everything will jam.

Second step: Measure the size of the robotic lawnmower garage
Once you've chosen the right material, the next step is to take your measurements. You can usually find the dimensions of your robotic lawnmower in the product packaging or the user manual. If you don't have these to hand, or if you've already thrown away the packaging, you can also check the manufacturer's website. For the Navimow i Series, for example, you can find the dimensions directly under the "Specifications and Comparison" menu item: 545 × 385 × 285 millimeters. We recommend planning for a garage that is about 30 centimeters larger than the robot itself. If you take a look at the garages offered by the manufacturer, you'll notice that they are usually only 20 to 25 centimeters larger. However, since spatial conditions vary depending on the material and online information isn't always accurate, it's a good idea to plan a little more generously.

Third step: Prepare materials for the robotic lawnmower garage
Once you've decided on the material and size of your garage, it's time to gather your tools and basic materials. Regardless of the material type, there are some basic tools you should definitely have on hand. A universal list is as follows:
- Tape measure / spirit level : For accurate measurements and to ensure that the garage is level
- Cordless screwdriver or drill : For drilling and fastening screws
- Screwdriver or wrench : For assembly and stabilization of the structure
- Saw, hand or electric : For cutting wood or acrylic sheets
- Sander or sandpaper: For smooth edges and protection against splinters
- Silicone or sealant: For sealing and water resistance
- Weatherproof varnishes or spray paints: For durability and visual design
- Work gloves and safety glasses: For personal safety
When it comes to building materials, you'll need them based on the planned construction. For a particularly DIY-oriented wooden garage, for example, you'll need:
- Frame: wooden strips for stabilization
- Floor: wooden pallets or concrete slab
- Side walls: several wooden panels
- Roof: roof tiles, corrugated iron or waterproof fabric
- Fastening material: wood screws or self-tapping screws
With this list and the measurements you determined in step two, you can easily go to the hardware store or online to get all the tools and materials you need.
Fourth step: DIY robotic lawnmower garage according to blueprint
Now it's time for the actual assembly, step by step, following the individual components of the garage. As an example, we'll again use a wooden garage and our construction plan, which will make your work much easier.
- Building the robotic lawnmower garage enclosure: Use sturdy wooden boards or pallets for the floor. If you want to save time, you can use a wooden pallet directly. For a DIY floor, you can assemble a rectangular frame from wooden slats and attach cross braces underneath for added stability. If the garage is located on damp grass, a PVC mat is recommended as moisture protection.
- Install the side and back panels: Place the two side panels on the floor and secure them with screws or L-brackets. Then add the back panel, creating a U-shaped structure. Use a spirit level to check that everything is level. If necessary, you can add corner strips for further stability.
- Attach the roof: Depending on your taste, you can choose a pent roof for good water drainage or a gable roof for a more attractive appearance. First, build the roof frame from wooden battens, then cover it with wooden boards or corrugated sheets. The roof should extend at least five centimeters to prevent rain from running down the walls. All joints are sealed with sealant. If desired, you can also apply a bitumen membrane. For convenient maintenance, the roof can be designed to be hinged, allowing the robot to be easily removed or cleaned.
- Sand and waterproof: After installing the roof, sand all edges thoroughly to prevent splinters. Then apply an even coat of wood preservative oil or outdoor varnish, ideally in two coats. Make sure to also seal particularly vulnerable areas, such as edges or screw holes, with silicone. Only when everything is completely dry can the robot be placed in the garage.

Fifth step: Decorate or add optional accessories
Once completed, you can decorate the garage as you wish or equip it with optional accessories. For example, you can install magnetic curtains or a swing door for increased security. Ventilation openings ensure the interior stays dry. Those looking for increased comfort can install LED lighting or an integrated charging station. Visual adjustments are also possible so that the garage blends harmoniously into the garden and doesn't appear out of place.

Summary
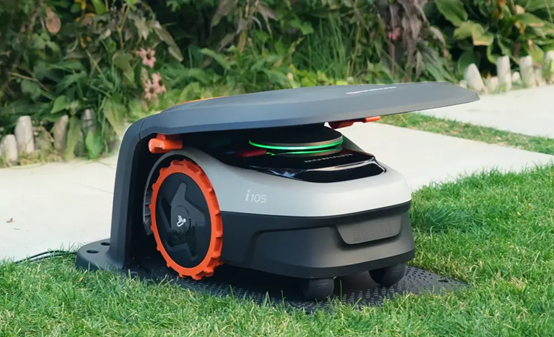
In short, a stable robotic lawnmower garage requires planning and solid construction. Measure the robot, plan for sufficient space and the correct roof angle, build the floor, side, and rear walls, install the roof, and seal everything. Sanding and wood preservative varnish make the garage durable and practical. If you want to save yourself the hassle, you can also opt for the Navimow i105 robotic lawnmower, which includes a suitable garage free of charge, providing all-round protection for the robot right away.
FAQs on the topic
How big should my robotic lawnmower garage be compared to the robot?
The garage should be about 30 centimeters larger than the robot, so there is enough space for removal, ventilation and optional accessories.
Which material is best for a DIY garage?
Aluminum is light and rust-proof, acrylic is inexpensive and flexible, wood is natural and easy to work with, and brick or metal is extremely stable but complex and expensive.
Does the garage have to be waterproof?
Yes, rain and moisture can damage the robot. Seal joints, seal edges, and use waterproof varnish or wood preservative oil on wood.
A PVC mat provides additional protection.
Can I install the garage on uneven grass?
Yes, but first check that the base is stable, use a spirit level, and if the surface is damp, plan for a moisture barrier or drainage, otherwise the robot will jam or be damaged.

Del: